It always astounds me how low cost scallion pancakes are when they have so much flavor and are so delicious. They do take a bit of time or some planning if you want to make them, but it’s worth every minute! You can always double the recipe and wrap the extras to keep in the freezer so you have them on hand for whenever a craving hits.
Unfortunately, I have not been able to play around with the recipe to try and adapt it for people who are gluten-free. I would think you can substitute the flour with a gluten-free baking mix…but I’m not sure if it would turn out too tough since there really aren’t a lot of ingredients to help the dough along. If I do manage to figure it out, I will share the results! But this recipe is true to how I make them.
This recipe is a combination of recipes and techniques from various sources, including my godmother and her Taiwanese recipe books mixed with my own likes and preferences. I hope you enjoy!
Scallion Pancakes
Ingredients
- 2 ½ cups all purpose flour, plus extra for dusting
- 1 cup hot water, plus extra if needed
- 5-6 stalks (approximately 1 cup) of scallions/green onions, washed and trimmed
- 1/8 of a teaspoon sugar
- ¼ teaspoon salt, plus extra for sprinkling
- ¼ cup of vegetable oil, plus extra for cooking
Steps
- Place the flour into a large mixing bowl and slowly add 1 cup of water in a steady stream while mixing with a wooden spoon or chopsticks. Keep mixing until it gets a bit too difficult to mix with the utensil.
- Knead the dough with your hand until a smooth ball is formed. If the dough is too sticky, sprinkle in a bit of flour at a time. If the dough is too dry, add in a bit of water to help moisten it. Only add a little bit of water or flour at a time. If you add a bit too much, don’t stress out, just correct the dough with a bit of water or flour.
- Once the dough has formed into a smooth ball, let it rest in a lightly oiled bowl covered with damp paper towels for 30 minutes. This lets the flour get hydrated and relaxes to the dough to make it easier to roll out.
- While the dough is resting, let’s prep the rest of the ingredients. Slice your green onions, then run your knife over the slices again they become minced pieces – this helps to release more of the onion flavor.
- Place the minced scallions into a small bowl and add the sugar and salt. Mix well and set aside until ready to use.
- After 30 minutes has passed, place the dough onto a lightly floured surface and roll into a log-shape. Then cut the dough into 8 pieces that are roughly the same size.
- Working with one piece of dough at a time, lightly flour the piece and use a rolling pin to roll it out into a rectangle shape that’s about 1/8th of an inch in thickness. Brush the rectangle with the vegetable oil and give it a good sprinkle of salt. Then spread about a teaspoon or two of the scallion mixture over the dough. Staring at the long end, tightly roll up the dough to form a rope, then twist the rope a few times. Coil up the dough starting at one end and tuck the tail end of it underneath. Give the coil a light press, then carefully roll it out to about ¼ of an inch in thickness. Note – I like my pancakes to be thicker so that the middle is a bit more chewy. You can roll them thinner if you want, just reduce the cooking time.
- Note: if you’re confused on how to roll these, I have a video posted above that shows you how to do it.
- Repeat step 7 until there are no pieces of dough remaining.
- In a non-stick pan, add a tablespoon of vegetable oil and heat over medium-low heat. Once hot, place a few of the pancakes into the pan and cook for 5 minutes, rotating them slightly to ensure that it cooks evenly and doesn’t stick. Flip the pancake and cook for another 5 minutes, rotating it every so often. Flip the pancake back onto the first side it cooked on and cook for another 3 minutes. Give the pancake a final lip and cook for a final 3-4 minutes. In total, they should cook for about 16-17 minutes. Once side should be a nice golden brown in color with a few darker spots, the other side won’t be as evenly cooked because that’s the way these tend to cook up.
- Repeat step 9 until all of the pancakes have been cooked up!
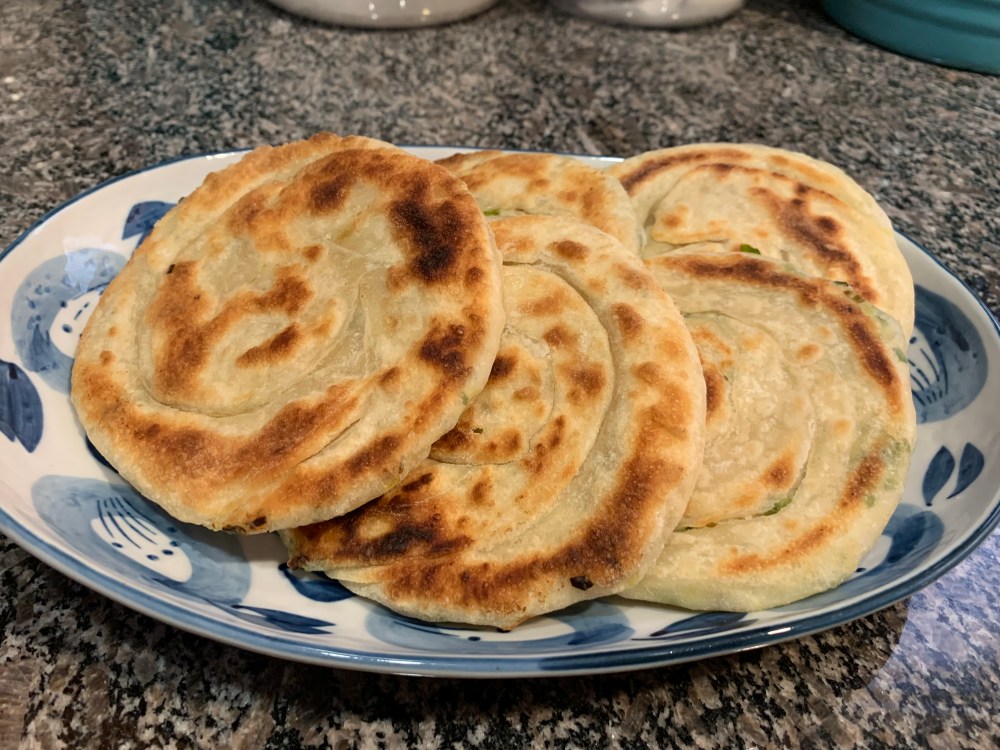
You can serve these with a dipping sauce, as a side to soup, or use them as a bread in a sandwich – which is something that I do!! If you have extras, you can wrap them up and store them in the freezer. To reheat, you can pop them into a toaster or in a pan with a little drizzle of vegetable oil.

My mouth is watering now. You make it look so easy, I almost wanna head home and try making them. It would have been cool, though, to see you eat one to see how it looks like when you tear into one.
Once you get the hang of it, it’s pretty easy, but a bit time consuming. So worth it, though! And I did film me ripping one open to show the layers, but cut it out to keep things short and tight!